Monday, 31 August 2015

Treat Petite - September 2015


I can’t believe that Treat Petite is now 2 years old!

Thanks to everyone who has taken part in our little challenge over the past couple of years and last month too - check out our GBBO entries over on Kat's page. Our aim was to celebrate everything that wasn’t a big honking cake, or pudding, loaf or whatever. Just smaller, petite treats – hence the name.


As you may know, I was a host for the Clandestine Cake Club in Dundee, but we have broken away from the official CCC and started up our own Dundee Baking Club. That way we can bring along baked goods which aren’t just cake – very much in the spirit of Treat Petite - which all our bakers seem very excited about. If you live in the Dundee area or surrounding towns, why not drop me an email if you are interested in joining?

Anyhoo, September is here and we are sticking with tradition and as with the past two Sept’s we are sticking with ‘Anything Goes’ as a theme.


That means no theme really, just anything that isn’t a big cake, pudding, loaf etc. For example a big trifle is a no-no, but individual trifles are a yes-yes!

The rules are below, and the only difference this month, is only one entry per blog please! Back to normal next month…

  • Add your petite treat to the Linky at the bottom of this post by the 25th of the month, midnight at the latest.
  • Post your bake onto your blog and link back to Cakeyboi and The Baking Explorer, stating who is hosting this month.
  • Follow Cakeyboi and The Baking Explorer blogs on Google + (see sidebar links), if you haven’t already.
  • If you tweet use  #treatpetite and mention @MrCakeyboi and @BakingExplorer – we will retweet Add the new challenge logo to the post and ‘Treat Petite’ as a label to the post
  • Use any recipe as long as the source is noted
  • If you like, add your photo to the ‘Treat Petite’ Pinterest board (request access from me – Cakeyboi)
  • Feel free to enter old posts as long as you update the post and meet all the requirements above!


Thursday, 27 August 2015

Peach Coconut Scones


Coconut oil is all the rage isn’t it? It’s the latest superfood – with so many health benefits, it’s a really versatile product that it can be used in many ways.

I was recently sent some by Vita Coco, in a lovely wee gift box which had a big jar of the oil and a smaller jar.

The little jar we have been using as a moisturiser, see what I mean about versatile!


With the larger jar of coconut oil I have been using it in cooking. This particular brand is cold-pressed, and retains a lot coconut flavour which other inferior brands don’t seem to.

As it has that lovely coconut taste, it is also good for spreading directly on toast or even stirring into a hot cup of coffee.

But as I said I have been using it in cooking. I fried onions in it for my Moroccan vegetable stew, and for this recipe I made scones.


I had peaches left over from my peachy lemon cake the other day, so decided to try making scones with the coconut oil instead of butter and adding chopped peaches. I also used maple sugar to sweeten things up, a natural sugar made from 100% maple syrup, and a wee bit of cinnamon. You could substitute brown sugar instead of maple here.

This combination made a soft scone dough which I actually baked in a greased cupcake tin, above. I could have cut them out individually yes, but I was being lazy and this seemed a much quicker option.


This resulted in perfectly baked scones, which I could have christened scuffins or cupcones or something, to keep in with the duffin, cronut trend, but decided to call them plain old, but tasty, scones.

They were perfect split, spread with a little butter, or even eaten on their own which Disneyboi did. All the flavours are subtle, no big whacks of coconut, cinnamon or maple, but they are meld together to compliment the peaches perfectly.

Here’s how I made them...

Peach Coconut Scones


Thumbnail Url Scones filled with peaches and made
with coconut oil
Cuisine: Snack Category: Scones Yields: 12 scones
Prep Time: Cook Time: Total Time:
 

Ingredients
  • 200 grams plain flour
  • ½ teaspoon salt
  • 50 grams brown or maple sugar
  • 1/8 teaspoon cinnamon
  • 1 tablespoon baking powder
  • 85 grams coconut oil
  • 2 large eggs
  • 85 grams 0% fat Greek yoghurt
  • ½ teaspoon vanilla extract
  • 250 grams canned peaches, chopped
  • Coarse sprinkling sugar
 
Instructions
  1. Preheat the oven to 180C and lightly grease a 12 cup, cupcake tin.
  2. In a large bowl, stir together the flour, salt, sugar, cinnamon and baking powder.
  3. Add the coconut oil, in solid form and rub this through the flour, until it looks like breadcrumbs.
  4. In a jug, beat together the eggs, yoghurt and vanilla extract.
  5. Add the wet ingredients to the dry and add the chopped peaches too.
  6. Mix until a dough forms, you may need to use your hands.
  7. Divide the mixture between the 12 sections of the cupcake tin. Sprinkle with the coarse sugar.
  8. Bake in the oven for 20 minutes or until golden brown.
  9. Remove from the oven and tip the scones out onto a cooling rack.
  10. Serve with a little butter.

Disclosure Statement: I was sent the coconut oil free to try. I was not asked to create a recipe. Any opinions expressed are my own.

Monday, 24 August 2015

Lemony Peach Cake


We were going to my cousin’s for a Saturday night pot luck sort of meal at the weekend. I, as you might expect, made dessert.

As were are still clinging onto the last gasps of summer, I wanted to make a sunny cake. Something light and delicious and fruity. And to me that spelled out peaches and lemon!


Don’t know why, but peaches and lemons conjure up sunniness and freshness, so off to the supermarket I popped for some. However I didn't go near the fresh fruit section, I got myself some canned peaches and some lemon extract. Cheating, I know.

I blended some peaches into a puree with my stick blender and folded this into the cake batter, adding some of the lemon extract. I baked this into two cake pans and when they were cooled, I split these into two, so I had four layers.


I then made a peachy, lemony buttercream too. I added some of the peach juice from the can to the buttercream and some more lemon extract.


I wanted to go for an ombre style icing effect, so coloured the buttercream into different shades, one batch natural, the others more yellowy and one pale orange. To get the effect, I put the coloured buttercream into disposable piping bags and piped the colours around before smoothing things off with a palette knife. Very simple, yet very effective.


I did sugar some lemon peel, I had a lemon kicking about the kitchen, to garnish the top, But that was about it. Everyone loved the cake and my mum grumbled at my meagre portions – she went back for seconds. Always a good sign.


Here’s how I made it.

Lemony Peach Cake


Thumbnail Url Cake with peach puree and lemon flavour
adapted from foodiebaker.com
Cuisine: Dessert Category: Cake Yields: 9" cake
Prep Time: Cook Time: Total Time:
 

Ingredients
  • 155 grams plain flour
  • 30 grams cornflour
  • 1 teaspoon baking powder
  • 1 teaspoon bicarbonate of soda
  • ½ teaspoon salt
  • 85 grams, unsalted butter, room temperature
  • 120 grams caster sugar
  • 1 medium egg
  • ½ teaspoon lemon extract
  • 125 grams peaches, pureed
  • 170 grams softened unsalted butter
  • 3 teaspoons peach juice
  • 750 grams icing sugar
  • ½ teaspoon lemon extract
  • Yellow and orange food colouring
 
Instructions
  1. Pre-heat the oven to 180C and grease and line two 9” round baking tins.
  2. Sift together the flour, cornflour, baking powder, bicarb and salt.
  3. In a separate bowl, cream together the butter and sugar until light and fluffy. Add the egg and beat this through, then add the lemon extract and beat this in too.
  4. Add the dry ingredient and stir until combined then lastly add the peach puree. Stir this through then divide the batter equally between the two pans.
  5. Bake in the centre of the oven for 25 to 30 minutes, until golden on top and a toothpick comes out clean from the centre. Allow to cool in the tins for 5 minutes before removing onto a cooling rack.
  6. Allow the cakes to cool completely and in the meantime make the buttercream by creaming together the 170 grams of butter, icing sugar, peach juice and lemon extract.
  7. Take one fifth of the buttercream and colour this pale orange and colour another fifth yellow.
  8. Split each layer of the cake into two and spread a layer of the uncoloured buttercream onto each, sandwiching them together. Spread a thin coating of the uncoloured buttercream all over the cake and refrigerate for an hour.
  9. After the hour, place the orange and yellow buttercreams into piping bags. Pipe these around the bottom and middle of the cake, Do the same for the top of the cake with the uncoloured buttercream.
  10. Go round the side of the cake with a palette knife, smoothing the buttercream. Clean the knife between each sweep of the cake.
  11. Refrigerate until ready to enjoy the cake.


Saturday, 22 August 2015

Saturday Swally with Aperol Spritz

Aperol Spritz

I have to be honest and say I hadn’t tried Aperol until they got in touch and asked if I would like to take part in the Aperol Spritz Challenge.

I had seen Aperol in the shops and bars, and it has always stood out to me because of its colour. It’s bright orange and orange, as you may know, is my favourite colour.

So what is it? Aperol is an Italian aperitif, which is made from oranges, both sweet and bitter, plus lots of other ingredients, but the full recipe is a bit of a secret.

It has been made in Italy since 1919 and its popularity has grown and grown.

aperol spritz

I have been to the website and seen old commercials for Aperol, I love the 1980’s ones which take me back somewhat.


Aperol Spritz is made from 3 parts Prosecco, 2 parts Aperol and 1 part soda water. As the add says, easy as 1, 2,  3! I was sent a bottle of Aperol, the prosecco and an orange, plus some nifty glasses and a huge ice bucket!

I had to try making the spritz and seeing what it was like.

Well, the flavour is unique. Definitely orangey, plus loads of other good things going on. With the sweet prosecco, and the bubbles, it is delicious and deceptively easy to drink. I almost forgot this was alcohol.

aperol spritz

If you haven’t tried Aperol before, I would certainly recommend it, and trying the spritz too. This is becoming quite a trend in the UK too, not just in Italy!

Enjoy your alcohol responsibly.


Disclosure Statement: I was sent the alcohol and other items free to review. I was not paid for this post and any opinion expressed are my own.

Thursday, 20 August 2015

'Moroccan' Vegetable Stew


Remember my Multi Cooker from Redmond? It’s the kitchen device that is many gadgets in one.


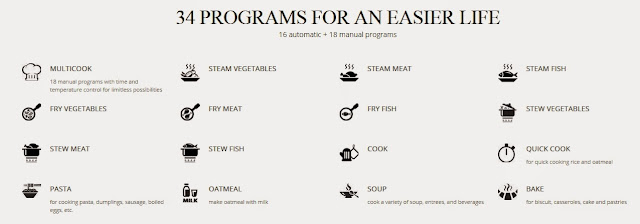
The RMC-M4502E Multi Cooker is a slow cooker, but so much more besides. You can fry in it, steam, bake, sterilise baby bottles, cook, make soups, so much!


In the past I have made fried mini churros in it, baked bread and made a cake.

However on this occasion I decided to go down the savoury route. No baking involved in this recipe.

It is a vegetarian stew, bursting with flavours of curry and cinnamon which gives it an almost Moroccan flavour. Not that I have ever been to Morocco, you understand! But that’s what I’m going with and hence the name of the dish…


I started by frying my onion in a little coconut oil, by having my multicooker on the fry function and when they turned translucent, I added some pre-cooked split yellow peas along with carrot and parsnip, plus some vegetable stock. Then I added the flavours of curry powder and cinnamon and let it stew for an hour.


I then got on with other household tasks whilst I waited for it to cook away. After the hour, I lifted the lid and saw a gorgeous stew waiting to be enjoyed.


As it was a little bit early for dinner, I switched the Multi Cooker onto 'keep warm' mode and it kept the dish at a good temperature, without cooking it further.

I served the stew with some rice and even my meat-loving partner Disneyboi enjoyed it. It was very filling and had loads of flavour, no need for meat. But if you wanted to be a bit more carnivorous, I would recommend lamb in this dish as the flavours of the cinnamon and curry would compliment it well.


The RMC-4502E Multi Cooker is such a versatile kitchen tool and I never run out of different ways to use the machine. It stores away perfectly when not in use and the handle on top makes it handy for moving about.


Gone in no time!

Here’s how I made the stew:

Moroccan Vegetable Stew


Thumbnail Url A vegetable stew flavoured with
cinnamon and curry powder
Cuisine: Vegetarian Category: Stew Yields: 4 servings
Prep Time: Cook Time: Total Time:


Ingredients
  • 1 ½ tablespoons coconut oil
  • 1 large red onion, finely chopped
  • 225 grams pre-cooked yellow split peas
  • 250 grams peeled and chopped carrots
  • 250 grams peeled and chopped parsnips
  • ½ teaspoon ground cinnamon
  • 1 tablespoon mild curry powder
  • Salt and pepper to taste
  • 500 ml vegetable stock
  • 125 ml coconut cream
 
Instructions
  1. Set your multicooker on the fry function for 10 minutes and melt the coconut oil in it.
  2. Once the coconut oil has melted, place the chopped onion in and stir until it turns translucent.
  3. Add the split peas, carrot, parsnip, cinnamon, curry powder, salt and pepper plus the vegetable stock and stir to combine everything.
  4. Turn the multicooker to ‘Stew’ function for one hour and close the lid.
  5. After the hour, open the lid and everything should have melded together into a hearty vegetable stew.
  6. Stir in the coconut cream and serve straight away on a bed of rice.
  7. Keep the stew warm, by setting the multicooker to ‘keep warm’ function.
  8. It’s as simple as that!


Disclosure Statement: This post contains affiliate links. I have been paid to create this recipe. Any opinions expressed however are my own.

Monday, 17 August 2015

Lemon Lavender Coconut Bars

lemon lavender coconut bars

I recently got my summer edition of BBC’s good food magazine and as the weather has been pretty rubbish up here in Scotland this summer, it certainly brightened my day up as is was pushed through the letterbox.


My subscription comes courtesy of  magazine.co.uk who kindly gave me the subscription in return for me writing some posts about the magazines I get. I love my food magazines and spend ages pouring through them. I also like adapting recipes from them!


lemon lavender coconut bars

In the good food magazine I saw a recipe for chocolate and coconut bars which did look delicious, but I had ideas… I had bought some lavender sugar the week before and I was dying to try it, so I decided to swap half the caster sugar in the recipe for that. Then I decided to add, instead of dried berries, some dried lemon peel I had in the cupboard. You could substitute any lemony jelly type sweet also, if you cut it into little bits here. Lemon and lavender are a great flavour combination.

lemon lavender coconut bars

Lastly instead of milk chocolate I went for white chocolate to sweeten things up more. The bars are made from egg whites, desiccated coconut and some other bits. The bars are very crumbly when baked and cut up, but that adds to the rustic nature.

The coconut texture is quite macaroon like (not to be mistaken with macaron!) and the flavours of lemon and lavender really brighten these little bars up.

lemon lavender coconut bars

If you would like to make lavender sugar, simply add some sprigs of dried lavender into a jar of sugar, like you would for vanilla sugar. The longer you leave the sugar, the more permeated it becomes with the lavender flavour!

Thanks again to magazine.co.uk for the subscription. If you would like to receive your magazines through the door, or gift a subscription to someone (it really is the gift that keeps on giving!) follow the link to magazine.co.uk.

Here’s how I made the bars…

Lemon Lavender Coconut Bars


Thumbnail Url Coconut bars flavoured with 
lemon and lavender and topped
with white chocolate
Inspired by BBC good food
Cuisine: Dessert Category: Bars Yields: 16 bars approx.
Prep Time: Cook Time: Total Time:
 
Ingredients
  • 50 grams lavender sugar
  • 50 grams caster sugar
  • 2 tablespoons golden syrup
  • 2 egg whites
  • 160 gram can of coconut cream
  • 2 teaspoons vanilla extract
  • 250 grams desiccated coconut (unsweetened)
  • 50 grams dried lemon peel or lemon jelly sweets chopped
  • 150 grams white chocolate melted
 
Instructions
  1. Line a 9”x9” square tin with greaseproof paper and preheat the oven to 180C.
  2. In the bowl of a mixer add the sugars, egg whites, syrup, coconut cream, vanilla and beat together until incorporated. Add the desiccated coconut and lemon peel and with a spatula fold these in to the wet mix until it is fully combined.
  3. Place the mix into the baking tin and flatten with an off-set spatula or similar so it is flat and even on top. Bake in the oven for approximately 25 minutes, or until it has turned golden brown on top and is firm to press.
  4. Allow to cool fully in the tin then gently remove and place onto a chopping board, peeling the greaseproof paper from underneath.
  5. Melt the white chocolate, either over a bain marie, or in the microwave and pour over the square of coconut bars. Allow to set fully – 2 to 3 hours.
  6. Cut into bars with a sharp knife, cleaning the knife off after every slice.
  7. Enjoy!


Thursday, 13 August 2015

Cherry Mojito No-Bake Cheesecake

cherry mojito no-bake cheesecake

I was in a rush at the weekend! We had the Foodies Festival in Edinburgh on Saturday as you maybe read about.

This weekend also meant other family stuff, plus Cake Club on Sunday night! What to do – where would I fit in time to bake a cake?

cherry mojito no-bake cheesecake

Well, how about not baking a cake at all?

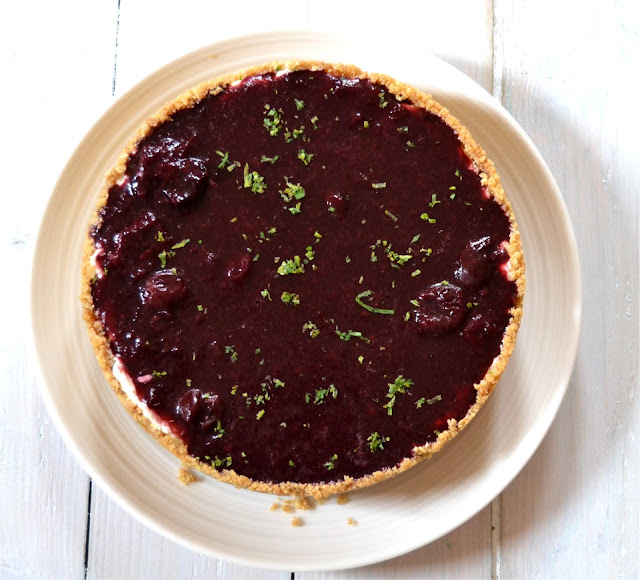
I decided to make a no-bake cheesecake and give it a summery flavour – mint and lime, plus a bit of rum for a mojito. Pop it in the fridge and let it do all the work!

cherry mojito no-bake cheesecake

Then I saw a recipe online for a Rainier mojito. No, not rainier as the summer we’ve had in Scotland compared to England, but Rainier as in Prince I guess. It has cherries in it. What a combo – sounded lovely to me, so a cherry mojito flavour it was.

The base of the cheesecake was classic digestive, sugar and butter.
The filling was made from cream cheese, whipped cream, sugar, and lime juice, a spot of mint extract and white rum – plus gelatine (sorry veggies!).

This would have been lovely on it’s own, but the thought of those cherries on top just intrigued me so I made a topping from blended dark cherries and some more gelatine.

cherry mojito no-bake cheesecake

It looked beautiful once it was all set and I cheekily took out a slice before the cake club, to photograph. It was difficult not having a wee taste there and then. But I resisted and popped the wedge back in.

My excuse was that the first slice is always a bugger to cut, so that went down well.
The theme of the cake club was summer and everyone brought a lovely selection of cakes for us to try. Here is a wee peak.


And here is the recipe for cherry mojito no-bake cheesecake…


Cherry Mojito No-Bake Cheesecake


Thumbnail Url Cheesecake flavoured with lime, mint
and rum, topped with cherries
(adapted from Mrs Ellwood's Simple Life)
Cuisine: dessert Category: cheesecake Yields: 9" cheesecake
Prep Time: Chill Time: Total Time:
 
Ingredients
  • 250 grams digestive biscuits
  • 113 grams melted unsalted butter
  • 55 grams granulated sugar
  • 300 ml double cream
  • 250 grams full-fat cream cheese
  • 125 grams caster sugar
  • 50 ml fresh lime juice
  • Zest of 2 limes
  • 1 sachet of gelatine (about 4 teaspoons)
  • 1 tablespoon white rum
  • ¼ teaspoon mint extract
  • 250 grams frozen cherries thawed
  • 1 tablespoon sugar
  • Juice of half a lime
  • 2 teaspoons gelatine
 
Instructions
  1. Blitz the digestives in a food processor until they are fine crumbs (or whack with a rolling pin) and stir in the 55 grams of sugar.
  2. Line a 9” springform pan with a sheet of greaseproof paper, whilst you melt the butter.
  3. Pour the butter into the digestive mix and stir to combine.
  4. Tip into the springform pan and press down with your hands to an even layer, coming about an inch up the sides. Place in the fridge to chill.
  5. In a small bowl, place the sachet of gelatine with 2-3 tablespoons of water. Let sit for 10 minutes. After the 10 minutes, heat the gelatine over a pan of simmering water until it melts. Remove from the heat as soon as it turns liquid.
  6. In the bowl of a food mixer, place the cream, cream cheese, 50 ml of lime juice, lime zest, caster sugar, rum and mint extract. Beat until stiff peaks form.
  7. Add the gelatine and beat for a further 2 to 3 minutes then transfer the filling to the chilled cheesecake base. Smooth over and return to fridge to chill for at least 2 hours up to overnight.
  8. To make the cherry topping, boil the cherries slowly with 3 tablespoons of water, for about 20 minutes.
  9. Transfer to a jug and blitz with a hand blender or mash with a fork. The mix shouldn’t be smooth. Add the sugar and juice of half a lime and allow to cool.
  10. Whilst cooling the cherry mix, place the 2 teaspoons of gelatine with some water letting it sit for 10 minutes, then heat as before, not allowing it to boil.
  11. Add the gelatine to the cherry mix and stir thoroughly, then pour this over the cheesecake, spread with a spatula so it is even.
  12. Return to the fridge to set, at least two hours.
  13. To unmould your cheesecake, open the springform pan and slide off the base onto a serving plate, ready to slice with a sharp knife.
  14. Serve with more lime zest and mint leaves for garnish


Monday, 10 August 2015

Our day at Foodies Festival Edinburgh


This weekend, Disneyboi and I ventured down to Inverleith Park in Edinburgh. This was the venue for the 'Foodies Festival' which is now in it's tenth year.

The festival is promised as a celebration of food and drink over a three day period. This year it had doubled in size as part of it's tenth year celebration.


We got there on Saturday just before midday. As we were lucky enough to be given VIP tickets, we went to the VIP tent and had a complimentary glass of fizz and collected our 'goody bags' .

We met up with our friends 'Fanny' from fab blog 'Keep Calm and Fanny On' and also Janice from 'Farmersgirl Kitchen'.


After a brief catch up, we went to book tickets at the events which were on were on in the various theatres at the park. There was the Chef's Theatre, Drinks Theatre and the Tasting, Cake and Bake Theatre to choose from, with various shows in each throughout the day.

There wasn't too much which took our fancy but we went for 'Autumn Drinks with Gin' hosted by Mike McGinty and 'How to Sniff Cocoa like a Rock Star'.


We had a wander around the festival, to try and take in as much as we could and get our bearings. We then grabbed a bite to eat, before the gin show. We both had pulled pork baps with black pudding and a bottle of Thistly Cross Strawberry cider, very refreshing.


We then headed to the tent for the Gin show. Mike was a very knowledgeable guy about gin and gave us samples of new a Bombay Sapphire gin 'Star of Bombay'. This was a very citrusy fresh drink and we sipped this as Mike then showed us a cocktail recipe for 'East India Punch' which had gin, tea, lemon, orange and peach and cardamom syrup. We had a taster of this also, getting a bit squiffy by this point.


Not to be deterred we then had another wander around the stalls and headed back to the VIP tent where we enjoyed a blonde ale from a company called The Campervan Brewery and chatted a bit more to 'Fanny'.


We visited more stalls and then it was time for the 'How to Sniff Cocoa Like a Rock Star' show. I have to say this was the low-point of the festival for me. A professional chocolate taster described how to sniff cocoa powder, stating that this was not something for children and wasn't really something to be recommended you do everyday. To be honest I wasn't sure why you would want to at all. There was no explanation as to what this was for - I expected an explanation akin to wine sniffing or something. But no, it just seemed to be for the hell of it - strange. He had a wee contraption that he sniffed the cocoa from then allowed all the audience the chance to do the same. - hope there were no drippy noses in the audience...

We declined and made our excuses. This whole show took approximately 5 minutes and was pointless to us. Still everyone else seemed to want to shove cocoa powder up their nostrils - each to their own I suppose.

We bought some lavender sugar from the Colstoun Cookery School stall. They were there promoting their full day cookery courses at their estate in hear Haddington, East Lothian, plus selling some of their produce too. I bought a couple of bunches of lavender too and might try making my own.


We also saw a stall for Audrey Baxter's relishes and curd range. Baxter's perhaps better known for their warming soups have a signature range of curds and we picked up new passionfruit and mango, very zingy, and raspberry. Our toast will be slathered with this stuff (or I may use it in some bakes)...

It was getting time for us to head away after having been there for a few hours. The party was still in full flow, with the entertainment near the entrance still pumping out.


I was disappointed this year at the lack of baking in the theatres, especially when one of the tents was called the 'Tasting, Cake and Bake' theatre. Sadly I missed 'Confectionary Made Easy' by Fiona Sciolti that was on once each day, which I'm sure would have been good. But I wonder if they struggled to get others to appear on stage for baking demos. A pity, as the nation does seem hooked on baking. Even though I'm practically unknown I would gladly appear next year, whipping up a sweet treat or two, or even my Arbroath Smokie cupcakes, if they struggle again!

The festival, which has doubled in size this year, seems to have made up for the extra stalls by putting in non-foodie related ones such as teeth-whitening, e-cigarettes, wooden furniture, jewellery - not quite the foodie extravaganza!

However, that was our day. The weather stayed fine for us and I even got a touch of the sun!  Mostly great foodie fun...

Disclosure Statement: I received free to tickets to the event and was not requested to promote the event. Any opinions expressed are entirely my own.


Thursday, 6 August 2015

Golden Oreo Crusted Peanut Butter Oreo Brownies

Golden Oreo Crusted Peanut Butter Oreo Brownies

Do you like Oreos? Do you like brownies? If your answer to both of these questions is yes, then you will love this recipe…

Golden Oreo Crusted Peanut Butter Oreo Brownies

I have received product from Oreo for this post. It is an entry to the Foodies100 Wonderfilled recipe challenge sponsored by Oreo, which marks the launch of two exciting new flavours: Peanut Butter and Golden. The delicious new flavours are available at all major supermarkets at an RRP of £1.08. To find out more, visit www.facebook.com/oreo


I have been lucky enough to be one of the first people in the UK to try these new flavours of Oreo. The Golden variety has the same delicious crème filling, but instead of a chocolate cookie either side it’s golden biscuit. If you are thinking custard cream, you’d be wrong. These are soooo much better!

Golden Oreo Crusted Peanut Butter Oreo Brownies

The other flavour is limited edition Peanut Butter. The cookie is the yummy chocolate that we know and love, but the crème filling is a smooth peanut butter flavour – who isn’t going to love that?!


Oreo are challenging food bloggers to come up with a recipe using one or both of these new flavours. I decided to make fudgy gooey chocolate brownies, crammed full of the peanut butter Oreos, atop a crunchy layer of Golden Oreo crust.


The Oreos are delicious on their own, but using them in this recipe showcases their flavours in a ‘Wonderfilled’ way.


Golden Oreo Crusted Peanut Butter Oreo Brownies


Thumbnail Url Golden Oreo crust with fudgy chocolate
brownies full of Peanut Butter Brownies
Cuisine: Dessert Category: Bars Yields: 16-20 brownies
Prep Time: Cook Time: Total Time:
 
Ingredients
  • 20 Golden Oreos
  • 65 grams unsalted butter
  • 125 ml vegetable oil
  • 1 teaspoon vanilla extract
  • 225 grams granulated sugar
  • 2 large eggs
  • 50 grams plain flour
  • 35 grams cocoa powder
  • ¼ teaspoon baking powder
  • ¼ teaspoon salt
  • 13 Peanut Butter flavour Oreos
 
Instructions
  1. Preheat the oven to 180C and line a 9”x9” square baking tin with foil.
  2. Blitz the Golden Oreos in a food processor until they are fine crumbs (or pop in a bag and whack with a rolling pin).
  3. Melt the butter and stir the Golden Oreo crumbs with the butter then transfer to the baking tin. Spread out evenly and press down firmly. Pop this in the fridge to chill.
  4. In a bowl sift together the flour, cocoa, baking powder and salt, set aside.
  5. In a separate large bowl, stir together the oil, sugar and vanilla. Add the eggs and stir through also.
  6. Add the dry ingredients to the wet and stir until combined fully.
  7. Pour the brownie batter over the Golden Oreo crust.
  8. Break the Peanut Butter flavour Oreos up roughly. Scatter these over the brownie batter, pushing down very gently with the back of a spoon.
  9. Bake in the oven for 25 to 30 minutes, the edges will start to look baked.
  10. Allow to cool fully before removing from the tin and cutting into squares.

Golden Oreo Crusted Peanut Butter Oreo Brownies

Disclosure Statement: This is a sponsored post. I received the Oreos to make a recipe with and will receive a payment for the review. Any opinions expressed are my own.