Monday, 29 April 2013

Jam Factory Jamboree!


A couple of weeks back my friend Jac from vegetarian site Tinned Tomatoes, asked if I would like to accompany her on a tour the Mackays’ Jam Factory in Arbroath. I jumped at the chance!

Aside from the factory being in my neck of the woods, I love Mackays’ product. They make a wide range of delicious marmalades, preserves, conserves and curds and I was very keen to see how they were made.

Upon our arrival at the factory, Claire, the Marketing Coordinator and our host, greeted Jac and me and gave us an insight into the history of Mackays, their products and how far the company has gone (50 countries around the globe in fact!).


Their production methods are very traditional and hands on. They use steam heated copper pans, which are made locally, to make their preserves, conserves, curds and marmalades, just like back in the day, as copper is the best conductor of heat and steam ensures an even temperature. Large paddles are used stir the fruit -which is hand weighed.

Copper Pan making jam

All the berries used in Mackays’ preserves and conserves are from Scotland, and their range of ‘Single Farm’ conserves only use berries from local farms. The raspberries and blackcurrants used in this range hail from Muirton Farm in Perthshire and the strawberries in the range come from Blacketyside Farm in Fife. Scottish berries are the best, and I’m not just saying that as I’m from Scotland, but our climate ensures a longer growth period, which gives a stronger flavour. They never compromise on using Scottish berries and even freeze some to use when berries are no longer in season.


It was fascinating to hear that Mackays are the only remaining producers marmalade in the Dundee area, using only Seville oranges imported from Spain. Their speciality is the Dundee Orange Marmalade, which celebrates the history of marmalade making in Dundee. They sell over 1 million jars of this a year. Mackays also make whiskey marmalade using brands such as MacCallan, Famous Grouse, Tullibardine, Bowmore and Glenfarclas. 


We embarked on our tour of the factory, but not before donning fetching hairnets, white coats (thankfully no photos exist) and scrubbing our hands. The fruity and sweet smells emitting from the factory were amazing - I was in heaven. We saw the 23 large copper pans, all full of fruit and sugar, bubbling away. 


In the pic above, the staff member was checking the float of the marmalade, to make sure the peel was evenly distributed. 


We moved onto the jarring area where we saw glass jars being inspected by hand to ensure none had any flaws, before being filled with marmalades when we were there and then lidded with signature copper coloured lids.  Claire explained that the copper lids had recently been designed to tell the story of the copper pan production. 


The jars were then washed and dried to clean them, ready for labelling. 


We saw the labelling process in action, which moved very quickly, and I was interested to hear that the back labels have to be changed depending on what country the orders are being exported to, to meet labelling regulations in local markets. 


The factory employs over 160 hardworking staff, mostly from the local area, and takes on more workers at seasonal times such as Christmas.


 Our tour ended up in the Mackays factory shop. This is somewhere I visit frequently. You can pick up lots of Mackays’ range, a good bargain or two and some other unexpected items. I would thoroughly recommend a visit to the factory shop, if you are ever on the East Coast of Scotland.


Mackays Single Farm Conserves are available in Tesco across the UK, and their core range can be found in Tesco, Morrisons, Co-op, Booths, Waitrose (in Scotland) and Sainsburys.  

Mackays are embracing the age of social media and can be found on Facebook, Twitter and Pinterest plus at their website you can place an order for UK delivery, or you can also visit their international page to contact the export team for information on international distribution.

Mackays kindly gave us some jars of their range to try out in recipes and I will be featuring some over the next wee while, so keep your eyes peeled (pun intended).

Lastly, a big thank you to Claire for the tour of the Mackays factory, it really was an enjoyable, fun and interesting visit.


Disclosure Statement: I have not been sponsored to write this post. I was not committed to writing a favourable review and views expressed are my own. 

Saturday, 27 April 2013

The Cakeyboi Alphabet - P - What's your favourite pie??

P is for Pie in the Cakeyboi Alphabet


Such a versatile food item a pie, isn't it? Sweet or savoury, designed as a way to encase all the filling so working men could take them out into the fields, pies have come a long way.

From Lemon Meringue to Steak and Kidney, the varieties are endless. My favourite is blueberry pie (can you see the blueberry juice leaking out above?). So tell me,  what is your favourite pie??

Thursday, 25 April 2013

Banana Strawberry Swirl Bread with Mermaid Cookware


I was lucky enough to be sent a hard anodised loaf tin from the kind people at Mermaid cookware. The 1lb tin is made of very strong aluminium, boasting that it is twice as strong as stainless steel.


I had a bread idea which I knew would be a good test for the tin. A banana strawberry swirl bread. I have seen swirl breads about and they all seemed to differ quite wildly. But I wanted a yeast bread, so quite unlike a cakey banana bread.

I used a recipe I found at Taste of Home and adapted this into Banana Strawberry Swirl bread, spreading strawberry jam on the flattened dough, then rolling it up like a swiss roll. The result was a delicious sweet bread, perfect for a snack at any time.

Ingredients:
60 ml milk
55 grams butter
55 grams sugar
300 grams plain flour
1 sachet fast acting dry yeast (7grams)
½ tsp salt
1 egg
2 small bananas, very ripe and mashed
200 grams strawberry jam (store bought)

Adapted from Taste of Home

Method:
In a saucepan, melt together the butter, milk and sugar. Take off the heat and allow to cool. In a large bowl mix together 100 grams of the flour, the yeast, salt, egg and banana. Add the milk mixture and mix this until a dough starts to form. Add more flour until you get a consistency that is no longer sticky and easy to handle. Knead on a floured worktop for 5 minutes before placing into an oiled bowl and covering with a tea towel. Leave the bowl in a warm place for 45 minutes, to let the dough prove. After the 45 minutes, the dough will have doubled in size. Place on a floured work surface and shape the dough into an oblong, wide enough to fit into your (oiled and floured) loaf tin. Spread the jam over the top of the dough and carefully roll this up tightly. Now the tricky bit, getting the dough into the prepared loaf tin. Use a couple of spatulas to help if the dough seems like it’s going to tear. Cover the tin with the tea towel and place in the warm place for another 45 minutes. Preheat the oven to 200oC.


After the 45 minutes, place the loaf tin into centre of the oven. Place a baking sheet on the shelf below to catch any jam that may wish to boil over! Bake for 30 to 35 minutes. The loaf will have risen and gone a deep brown colour on top. Allow to cool in tin for 10 minutes before carefully removing it. Place the loaf on a cooling rack, upside down, until completely cool. The loaf won’t have that hollow sound on the bottom when you tap it, don’t worry.


When cooled, cut into slices and enjoy the light banana bread taste that I’m sure you are used to, combined with a delicious swirl of sweet strawberry jam. The bread actually gets better the longer it sits, but remember this is a yeast bread, so it’s shelf life is less than a cake would be. Enjoy!!


As for the Mermaid tin, it performed very well. The loaf was baked evenly. I did worry about the caked on jam but this come off, using a metal scourer, as metal won’t damage the surface. The edges of the pan are a little sharp, so to take care if any little ones are handling the tin. But a great tin to use. Thanks Mermaid!

Wednesday, 24 April 2013

Monday, 22 April 2013

Speculoos Cake Doughnuts with Chocolate Glaze


biscoff doughnuts

A couple of months back I was very excited, as I had picked up some ‘Speculoos’ on our last trip to London. Didn’t see it? What is Speculoos?

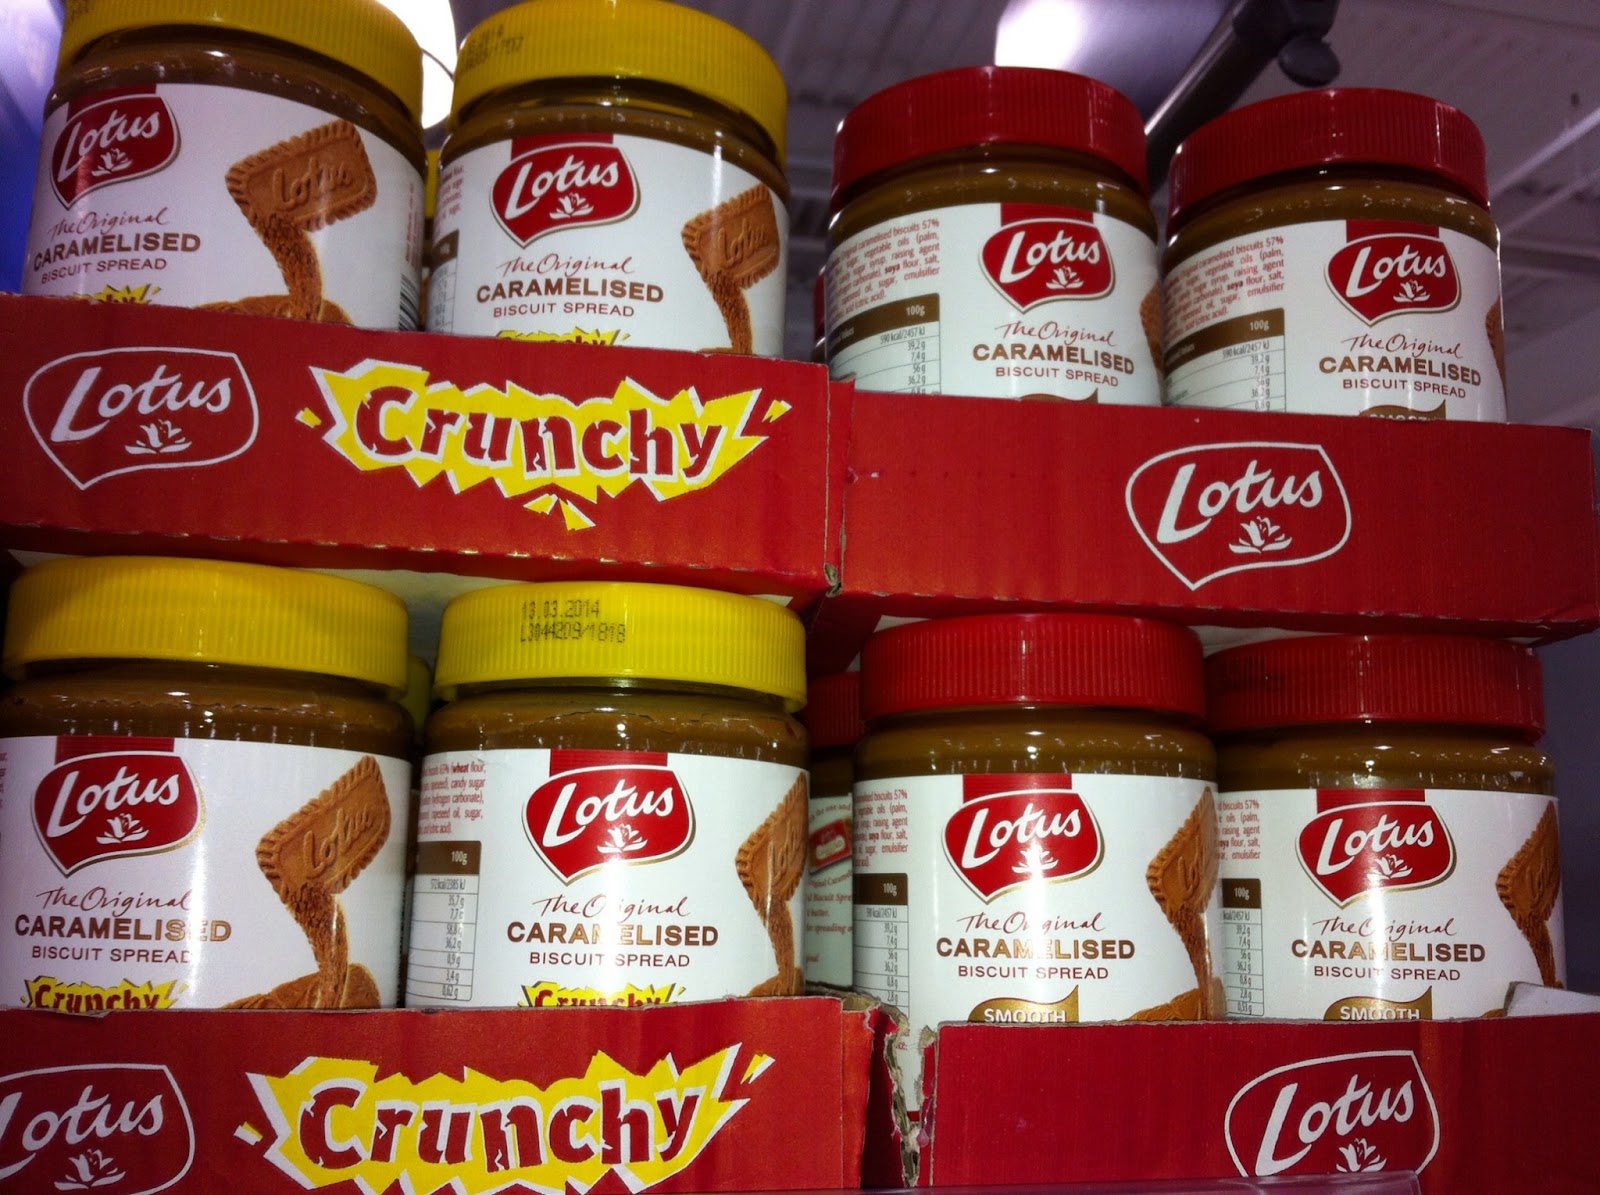
Well, Speculoos seems to go by a few different names depending where you are in the world. Biscoff spread, Lotus Spread and Cookie Butter are other names it goes by. But basically it is a paste, similar in texture to peanut butter, which is made from those yummy Lotus biscuits, you know, that taste all cinnamony and delicious!


And I was even more excited when I discovered that Speculoos (Lotus, the original caramelised biscuit spread, in the UK) is now available in all Sainsbury’s stores. I bought some of the crunchy variety, as I love this on toast. But my very kind boss handed me a jar recently of it (from Europe) and it actually has Speculoos on the label!


Anyway, I decided to celebrate it being available near me, by making another Speculoos recipe. I found a recipe online for doughnuts using this spread and set about making them, but with a chocolate glaze and crushed Lotus biscuits on top. If you don’t have a doughnut pan, just bake these into cupcakes and they will be just as yum.

Speculoos Doughnuts
Yield: 10 doughnuts
Ingredients;
100 grams plain flour
115 grams granulated sugar
½ tsp salt
125 ml buttermilk
75 grams smooth Speculoos spread
1 tsp baking powder
¼ tsp nutmeg
½ tsp cinnamon
1 medium egg
½ tsp vanilla extract
15 grams unsalted butter, melted

adapted from Mommy’s Kitchen

Chocolate Glaze
Ingredients:
60 grams unsalted butter
60 ml milk
½ tbsp golden (or corn) syrup
1 tsp vanilla extract
60 grams plain chocolate chips
125 grams icing sugar

adapted from Food Network

8-10 Lotus biscuits, crushed

Method:
Preheat your oven to 160oC. Spray a doughnut pan with cooking spray or lightly grease. If making into cupcakes, place liners in a 12 cup tray.

In a bowl sift the flour, salt, cinnamon, nutmeg and baking powder together. In another bowl, whisk together the sugar, buttermilk, egg, vanilla, Speculoos and melted butter until smooth. Add the flour mix and stir to combine. Place the batter into a food bag, snip off the corner,  or piping bag and pipe into the doughnut wells, about 2/3 full. I got 10 doughnuts from the batter, so had to do this in two stages. Divide the batter equally between the cupcake liners, if making those.


Place into the oven for 8-10 minutes for the doughnuts, or 10-12 minutes for cupcakes. A toothpick should come out clear from the centre. Allow to cool.


To make the glaze, in a saucepan, melt the butter with the milk, syrup and vanilla. Remove from the heat and add the choc chips, stirring until melted. Lastly sift in the icing sugar and stir to incorporate. Use a knife to spread on the thick glaze. I then dunked each doughnut into the crushed biscuits. Allow the glaze to dry and then enjoy your doughnuts.


The doughnuts are light and cakey in texture with the subtle taste of the Speculoos spread. The chocolate glaze turns a nice chewy texture when set up thanks to the syrup and the crunch on top of this just finishes things off nicely, especially with a cup of coffee. Enjoy.

Check out my Speculoos frosting and Speculoos blondies.

Saturday, 20 April 2013

The Cakeyboi Alphabet - O - Whats your biggest baking disaster??

Poor cakey!


One of my biggest mistakes in the kitchen is overbaking! I never set a timer and then forget when I have popped my baked good in the oven. I haven't quite found cinders on the baking tray - yet. But there is always time!

Tell Cakeyboi your biggest baking disaster here or over on the Cakeyboi Facebook page.

Thursday, 18 April 2013

London Fog – Just like Starbucks


Anybody who knows Disneyboi and I know our love of Starbucks. If you are looking for either one of us, more often than not we are sipping beverages in our local ‘bux. It has been said that we should get shares in the place.

I usually plump for a filter coffee, sugar-free vanilla syrup and soy milk. But Disneyboi sometimes goes for something altogether different. London Fog. What the heckythump is that you might ask? I wondered myself – and to be honest so do some baristas.

London Fog can also be called Early Grey Tea Latte or  Vanilla Tea Misto. It originated in Vancouver in Canada and there are differing types of ways to make the drink. But I made mines a nice and simple way…

Ingredients:
Early Grey Tea Bag
Semi-skimmed milk
1 ½ tbsp vanilla syrup

Method:
Measure the milk in the cup you are going to enjoy the drink from. Pour this into a saucepan and add the teabag. Slowly bring the milk and teabag to a simmer.


In the meantime add the vanilla syrup to the cup.


Once the milk is slowly bubbling, remove from the heat. I frothed mines up a little at this point. Remove the teabag and place into the cup on top of the vanilla syrup. Then pour the milk over the top of these.

And that is it. It is quite a flexible recipe. Add more or less syrup according to taste, add more than one teabag if you love the bergamot flavour, or remove the bag after boiling the milk. Up to you.

I am not a fan of sweet tea, mines has to be just with a splash of milk. But this is very different than sweet tea and I do like a London Fog now and again. Go on, give it a try!

Wednesday, 17 April 2013

Cartoon Time - Ice Cream

Edvard Munch had quite an apt name...


Monday, 15 April 2013

Rolo Brownies with Peanut Butter Frosting


I had a couple of packs of Rolos left over from Easter eggs the other week and thought they might work well mixed into brownies. I hadn’t made brownies in a while and was in the mood. But I wanted to pimp my brownies a bit more, so thought about frosting the tops. And what goes perfectly with chocolate? Peanut butter! I love peanut butter and chocolate together. So do Americans if you check out their ‘candy bars’ they all seem to have PB in some form. At least we have one - a PB Kit Kat Chunky!!

Back to the brownies, and you could make a packet mix if you wanted to, but I made mines from scratch. Such an easy treat to make, and the frosting was pimples too.


Rolo Brownie Ingredients:
125ml vegetable oil
1 tsp vanilla extract
225 grams granulated sugar
2 large eggs
50 grams plain flour
35 grams unsweetened cocoa powder
¼ tsp baking powder
¼ tsp salt
 2 tubes of Rolos, each rolo cut in half

Peanut Butter Frosting Ingredients:
85 grams unsalted butter, softened
190 grams smooth peanut butter
125 grams icing sugar
½ tsp vanilla extract
1-2 tbsp milk

Method:
Preheat your oven to 180oC and line an 8”x8” square pan with greaseproof paper.
In a bowl, sift together the flour, cocoa powder, baking powder and salt.
In another bowl, cream whisk together the sugar and oil, then add the eggs and vanilla and whisk until combined.
Add the flour mix and mix with a wooden spoon or spatula, just until the dry ingredients have been absorbed. Transfer the mix to the prepared pan and smooth into an even layer. Sprinkle over the chopped Rolos and push each one down lightly, to submerge them in the brownie mix.


Pop the pan into the oven for 18-20 minutes. The brownies won’t rise very much, but this is normal. Remove from the oven and allow to cool completely. Remove from the pan and peel off the greaseproof paper. Put more paper in the pan and replace the brownies.


To make the frosting, in the bowl of a mixer, cream together the butter and peanut butter. Add the vanilla and icing sugar and mix until smooth. If the mixture seems too dry, add drops of milk until you get a smooth consistency. Beat for a couple of minutes and then spoon onto the top of the brownies, spread to a nice smooth layer. Pop into the fridge and allow the frosting to chill for about an hour. Remove from the pan and cut into squares, as big or as little as you like!

The brownies are nice and fudgey and the Rolos give a caramel chew when you bite into them. And that frosting is super thick, delicious in a salty and sweet way, a perfect compliment to the chocolate brownies. Devour!!

Saturday, 13 April 2013

The Cakeyboi Alphabet - N

Can't believe that the alphabet is over the half way mark! Where is this year going?
Anyhoo, N is for nom nom nom...


Hopefully this might be the sound you make when you try out a recipe from Cakeyboi. But called me old fashioned - where did 'nom nom nom' come from? It's only in the past couple of years I have noticed it used to describe the sound someone makes when enjoying something tasty.
I think it's a great word. I'm just puzzled. Has this be around for aeons, or is it just me?!

Thursday, 11 April 2013

Cherry Cola Marshmallows


I hadn’t made marshmallows in such a long time and I had bought the wonderful Shauna Sever book – Marshmallow Madness! Whilst having a flick through I saw a recipe for Kool-Aid Marshmallows and I had a sachet of Kool-Aid hanging about in my cupboard.

It was cherry flavoured, and I had an idea of making cherry cola mallows. I was obsessed with Cherry Cola when it came out in the UK, in the 80’s. I thought it was very American and drank gallons of the stuff. Thankfully that obsession died out, but I still love the odd bottle.

I wondered if adding some cola flavoured syrup to the mix might make the mallows taste akin to my old favourite drink and I was not disappointed. I used Soda Stream Sugar Free Cola Syrup as well as the Cherry Kool-Aid (remember to check online if you can’t get hold of them where you are).


If you haven’t made mallows before, you do need a stand-mixer as the mixture needs to beat for 12-15 minutes on a high speed. Not the sort of thing we mere mortals can do…You will also need a sugar thermometer and corn syrup (golden syrup, if you can’t get hold of that).

Ingredients:
1 sachet of Cherry Kool-Aid
120 ml cold water
5 teaspoons unflavoured powdered gelatine
180 ml granulated sugar
120 ml corn syrup (or golden syrup), divided
60 ml water
pinch of salt
1 ½ tablespoon cola syrup

Dusting:
60 grams icing sugar
50 grams cornflour (mix these together)

Method:
Spray an 8”x8” baking pan with baking spray (or lightly grease with veg oil).
Place the Kool-Aid, 120 ml water and gelatine in a microwavable bowl, stir together and set aside for a few minutes.


In a saucepan, place the sugar, 180ml of water 60 ml of the corn syrup and the cola syrup. Heat on high and attach the thermometer. Let this boil to 115oC.  Whilst this is boiling, place the remaining corn syrup in the bowl of the mixer with the whisk attachment in place, and start to beat on the lowest setting. Heat the gelatine mix in the microwave for 30 seconds. Add this to the mixer, When the syrup has reached 115oC  start to drizzle this slowly into the mixer bowl, then crank the mixer up to medium for 5 minutes. After 5 minutes, crank the mixer up to medium high for another 5 minutes. After this 5, set the mixer speed to maximum for 2 minutes. In this time, the mix will have gone from red liquid to a light pink fluffy mass.


Spread this into the prepared pan and dust the top liberally with the icing sugar/corn flour mix. Allow to set for at least 6 hours (I let mine set overnight).

When set, remove the mallow block from the pan and cut into whatever shapes you want. I made mine into semi-circles, with a cookie cutter and coated the edges in some blue sugar crystals. Dust any exposed area with more of the icing sugar/cornflour mix.


I think mines look more like tuna steaks, or raw beef medallions sadly! But they still tasted like my old favourite drink, cherry cola! Enjoy…

Wednesday, 10 April 2013

Monday, 8 April 2013

Butter Mint Cookies


I was having a bit of a clear out of my baking bit and bobs, checking the sell by dates on some of my used ingredients and came across a couple of things I hadn’t used in a while. The mint chips I used in my ChocMint Chip Cookies and the butterscotch chips, used in my Butterscotch Cinnamon OatmealCookies.


They were in date still, and I popped a couple in my mouth, and I was hit with an idea. The taste of the butterscotch and mint together was like butter mints, which I hasn’t had in a long time. I thought the combo of these add-ins would be perfect in cookies and so my Butter Mint Cookies were born…


I know these are American ingredients, but they are available on-line if you can’t find them near you. The cookies make these worth ordering. The amounts I used are what was leftover, but they balance just the right amount of mint and butterscotch (luckily!).


print recipe

Butter Mint Cookies
Ingredients
  • 225 grams plain flour
  • 1 teaspoon baking powder
  • 115 grams unsalted butter, softened
  • 150 grams light brown sugar
  • 170 grams granulated sugar
  • 1 teaspoon vanilla extract
  • 2 eggs
  • 55 grams mint chips
  • 125 grams butterscotch chips
Instructions
Pre-heat the oven to 180oC and line a couple of cookies sheets with greaseproof paper. Sift together the flour and baking powder in a bowl and set aside. In the bowl of a mixer, cream the butter and the sugars together, until pale and fluffy. Add the vanilla and eggs, and beat until the mixture is combined and thickened slightly. Add the flour mix and combine just until no streaks of flour can be seen. Lastly by hand, stir through both varieties of chips. With a cookie (ice cream) scoop, scoop large balls of dough onto the prepared cookie sheets. I got 5 on each sheet, spacing them out well, so they do not spread into one another when baking. Pop into the oven for 15 minutes or until golden brown around the edges. Remove from the oven and allow to cool on a wire rack. Devour (and enjoy!)
Details
Prep time: Cook time: Total time: Yield: 10 large cookies